2006 - 2016 R6 PCV Installation

Post Reply
User avatar
ohioyj
Site Admin
Posts: 101
Joined: Thu May 09, 2024 4:52 pm
Contact:

2006 - 2016 R6 PCV Installation

Post by ohioyj »

This guide was written using my 2007 R6, the 2006 should be identical. 2008+ will be similar.

Start by removing the seat. There are two bolts under the seat in the rear, just lift up on the rear corners, you'll see them. Be careful when reinstalling these bolts, they use inserts in the frame that can break loose and freely spin. Those bolts don't need to be super tight.

Next remove the plastic side panels. They have Phillips head screws in them, and it is very important whenever removing a Phillips head screw to use the correct size Phillips screw driver. Make sure the screw driver fits tightly. Or if you are like me, and got tired of buying new panels every time they broke, cut the zip ties. Once the screw is removed slide the panel forward, it will just come off.

Image

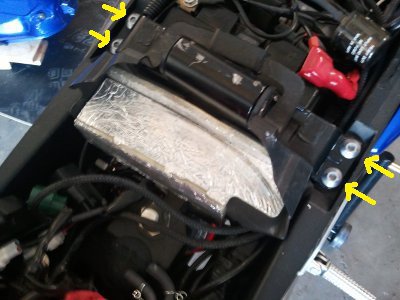
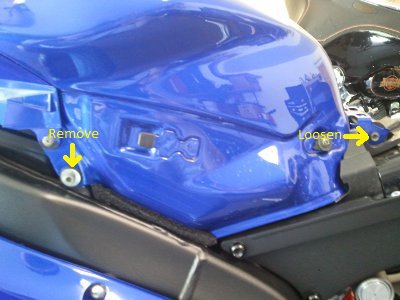
Next remove the side bolts on the gas tank. Loosen the back bolt but do NOT remove it yet.

Image

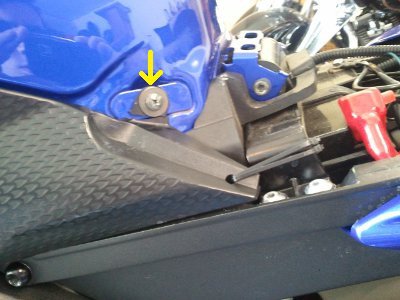
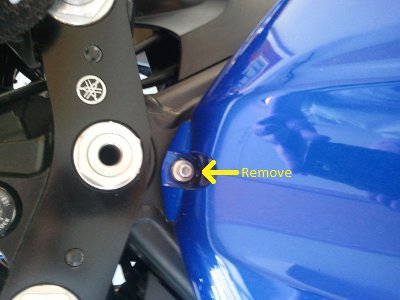
Next remove the top bolt

Image

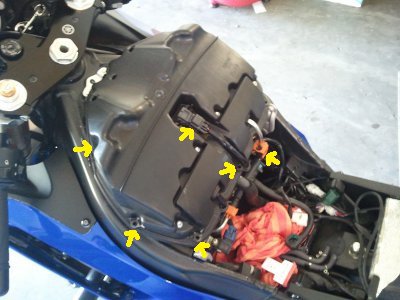
Now carefully lift up the tank, careful not to over extend any wiring, or hoses. If you are doing this by yourself, you can use a board to support the tank. Do NOT put the board under the plastic front part of the tank, place it on the metal part of the tank only!

Image
User avatar
ohioyj
Site Admin
Posts: 101
Joined: Thu May 09, 2024 4:52 pm
Contact:

Re: 2006 - 2016 R6 PCV Installation

Post by ohioyj »

Remove the two electrical connectors, one white one brown. Then remove the two vent lines, those spring clamps are pretty weak, you can remove them by hand. Finally remove the fuel line, notice the cover over the green buttons, this slides back to expose those buttons. Then squeeze the green buttons and pull down. Do NOT force anything, the output on the fuel pump only plastic! WARNING, the fuel system is pressurized. Have a large rag already under the tank, to soak up any fuel that sprays out or leaks out. Also gas may spray out, as it's under pressure, safety glasses couldn't hurt. Also remember you can pulse the injectors in DIAG mode, to help relieve the pressure.

Image

Most people place the PCV in the tail, if you do this you will need to remove the tail. I mounted mine on top of the ECM, and leave the USB cable plugged and in the tail. Notice my "rain shields" for the PCV, AutoTune, and SpeedoHealer. They are water resistant, but I chose to add little pieces of plastic to avoid any issues later down the road. Also note in that location I had to clearance the aluminum bracket back there to clear the USB cable on the PCV.

Image

You will also have to remove the tank support bracket, to route the wiring for the PCV.

Image

Pretty much all the wiring you need to tap into is all in one spot.

1. O2 Simulator, Optional, not all bikes use this.
2. This is the main injector harness, you just unplug it and plug the PCV into those plugs.
3. Is the speed sensor harness, there are two because my bike has a speedo healer on it. I only mention this, as a way to tap into the speed sensor for different maps for each gear on the PCV if you plan on running an AutoTune.
4. EXUP Eliminator plug.

Image
User avatar
ohioyj
Site Admin
Posts: 101
Joined: Thu May 09, 2024 4:52 pm
Contact:

Re: 2006 - 2016 R6 PCV Installation

Post by ohioyj »

Now while you have the tank off, it is the perfect time to clean or install a new air filter. Start by removing the screws all the way around the air box. Next unplug the atmospheric pressure sensor. Finally disconnect the fuel line to the secondary injectors, it is removed just like the fuel pump one. Then lift off the box top, note there is still a wire running into it, so just lay the box on the bike. If you have disconnected the fuel pump, you already mostly depressurized the system, but have a rag ready, some gas will still drip out of the this line when you disconnect it.

Image

There is a correct order to screw down the new air filter:

Image
Post Reply